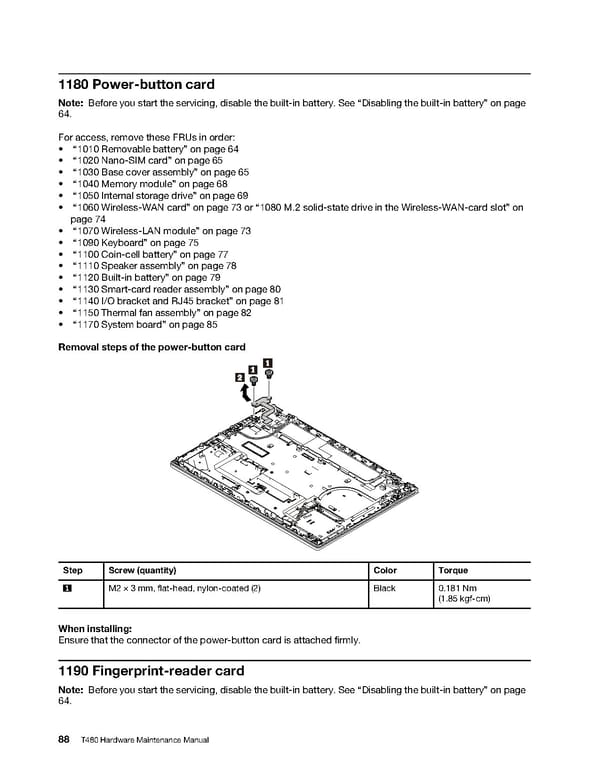
1180 Power-button card Note: Before you start the servicing, disable the built-in battery. See “Disabling the built-in battery” on page 64. For access, remove these FRUs in order: • “1010 Removable battery” on page 64 • “1020 Nano-SIM card” on page 65 • “1030 Base cover assembly” on page 65 • “1040 Memory module” on page 68 • “1050 Internal storage drive” on page 69 • “1060 Wireless-WAN card” on page 73 or “1080 M.2 solid-state drive in the Wireless-WAN-card slot” on page 74 • “1070 Wireless-LAN module” on page 73 • “1090 Keyboard” on page 75 • “1100 Coin-cell battery” on page 77 • “1110 Speaker assembly” on page 78 • “1120 Built-in battery” on page 79 • “1130 Smart-card reader assembly” on page 80 • “1140 I/O bracket and RJ45 bracket” on page 81 • “1150 Thermal fan assembly” on page 82 • “1170 System board” on page 85 Removal steps of the power-button card Step Screw (quantity) Color Torque 1 M2 × 3 mm, flat-head, nylon-coated (2) Black 0.181 Nm (1.85 kgf-cm) When installing: Ensure that the connector of the power-button card is attached firmly. 1190 Fingerprint-reader card Note: Before you start the servicing, disable the built-in battery. See “Disabling the built-in battery” on page 64. 88 T480 Hardware Maintenance Manual
 T480 Hardware Maintenance Manual Page 93 Page 95