Embed RELAYTO in Salesforce

This guide explains how to embed the RELAYTO app inside Salesforce Sales Cloud (Lightning Experience) using a Visualforce (VF) page exposed as a tab, and then add that tab to your main Salesforce app.

Who is this for

  • Salesforce Admins (Lightning Experience)
  • RELAYTO workspace admins who want RELAYTO to appear inside Salesforce

What you’ll get

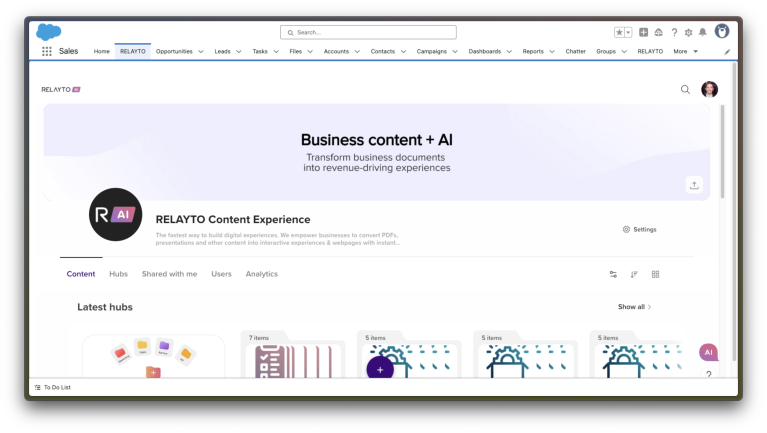
  • A RELAYTO tab in Salesforce that loads your RELAYTO workspace in an iframe.

Prerequisites

  • Salesforce Lightning enabled and you have Customize Application permissions.
  • Your RELAYTO workspace URL, e.g.:
    https://your-subdomain.relayto.com/

Step 1 — Add RELAYTO to Salesforce CSP Trusted Sites

  1. In Salesforce, go to SetupCSP Trusted SitesNew Trusted Site.
  2. Trusted Site Name: RELAYTO
  3. Trusted Site URL: your RELAYTO base, e.g. https://your-subdomain.relayto.com
  4. Under Directive Options, check all the boxes:
    1. frame-src / connect-src img-src / font-src / style-src
  5. If your RELAYTO experience loads assets from CDNs (e.g., https://cdn.relayto.com), add those as separate trusted sites.

Step 2 — Create the Visualforce page

  1. Navigation: SetupVisualforce PagesNew
    1. Name: RELAYTO
    2. Label: RELAYTO
  2. Paste this markup and replace https://your-subdomain.relayto.com/  with your workspace URL.:
<apex:page docType="html-5.0" showHeader="false" sidebar="false" lightningStylesheets="true">
    <style>
        html, body, .wrap { height: 100%; margin: 0; }
        iframe { width: 100%; height: 100vh; border: 0; }
    </style>

    <!--
      Replace the src with your RELAYTO experience URL.
      You can safely pass Salesforce context as query params (e.g., user/org/record),
      or use a short-lived signed token generated by your backend.
    -->
    <div class="wrap">
        <iframe
            src="https://your-subdomain.relayto.com/"
            referrerpolicy="no-referrer"
            allow="clipboard-read; clipboard-write; fullscreen"
            sandbox="allow-forms allow-scripts allow-same-origin allow-popups allow-popups-to-escape-sandbox">
        </iframe>
    </div>
</apex:page>

Step 3 — Create a Visualforce Tab

  1. SetupTabsVisualforce TabsNew
  2. Visualforce Page: RELAYTO_Embed
  3. Tab Label/Name: RELAYTO
  4. Choose a Tab Style (any icon).
  5. Next → select profiles that can see the tab → Save.

Step 4 — Add the tab to the navigation

  1. SetupApp Manager
  2. Find your main Lightning app (e.g., Sales), click Edit.
  3. Go to Navigation Items.
  4. In Available Items, find RELAYTO and move it to Selected Items.
  5. Arrange the order (drag to your desired position).
  6. Save.