Learn how to enhance your hub design and branding but making it personalized.
How To Create
Step 1
Click on the "Hubs" tab in your personal or company account dashboard.
.png)
Step 2
Click the "Add New Hub" button on the left side of the screen.
.png)
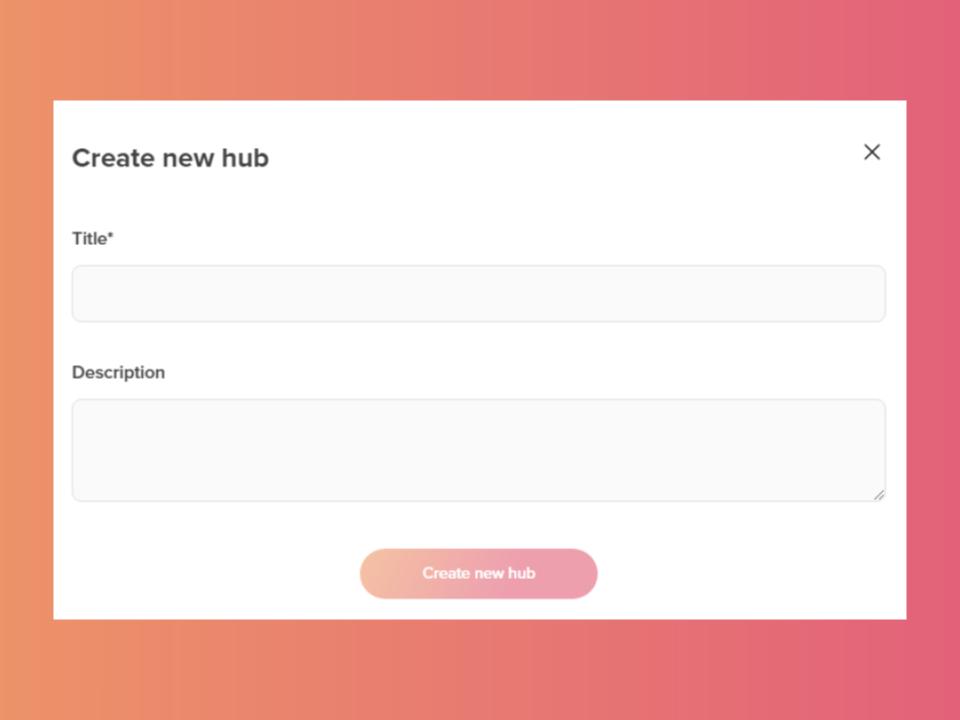
Step 3
Write Title and Description then, click "Create a New Hub".
How to Add Content
Step 1
Click the plus sign (+) on the middle bottom of the hub and then "Add existing content" option.
.png)
Step 2
You can choose between adding experiences on My Content tab or sub-hubs on Hubs tab.
To understand better How to Create a Sub-hub, click here.
.png)
How to Edit
Step 1
Click on "Settings" at the top right corner.
.png)
Changing Title & Description
Click "Details" tab to edit the title and description.
.png)
Changing Cover & Logo
In Enhancements, click Cover design or Hub logo to edit the hub banner.
To understand better How to Edit a Hub's Cover and Logo, click here.
.png)
Adding a Call-to-action
Click "Call-to-action" and then "Edit". There you can add a button or an icon that can include links, emails, media files and others.
To understand How to add and edit Call-to-actions, click here.
.png)
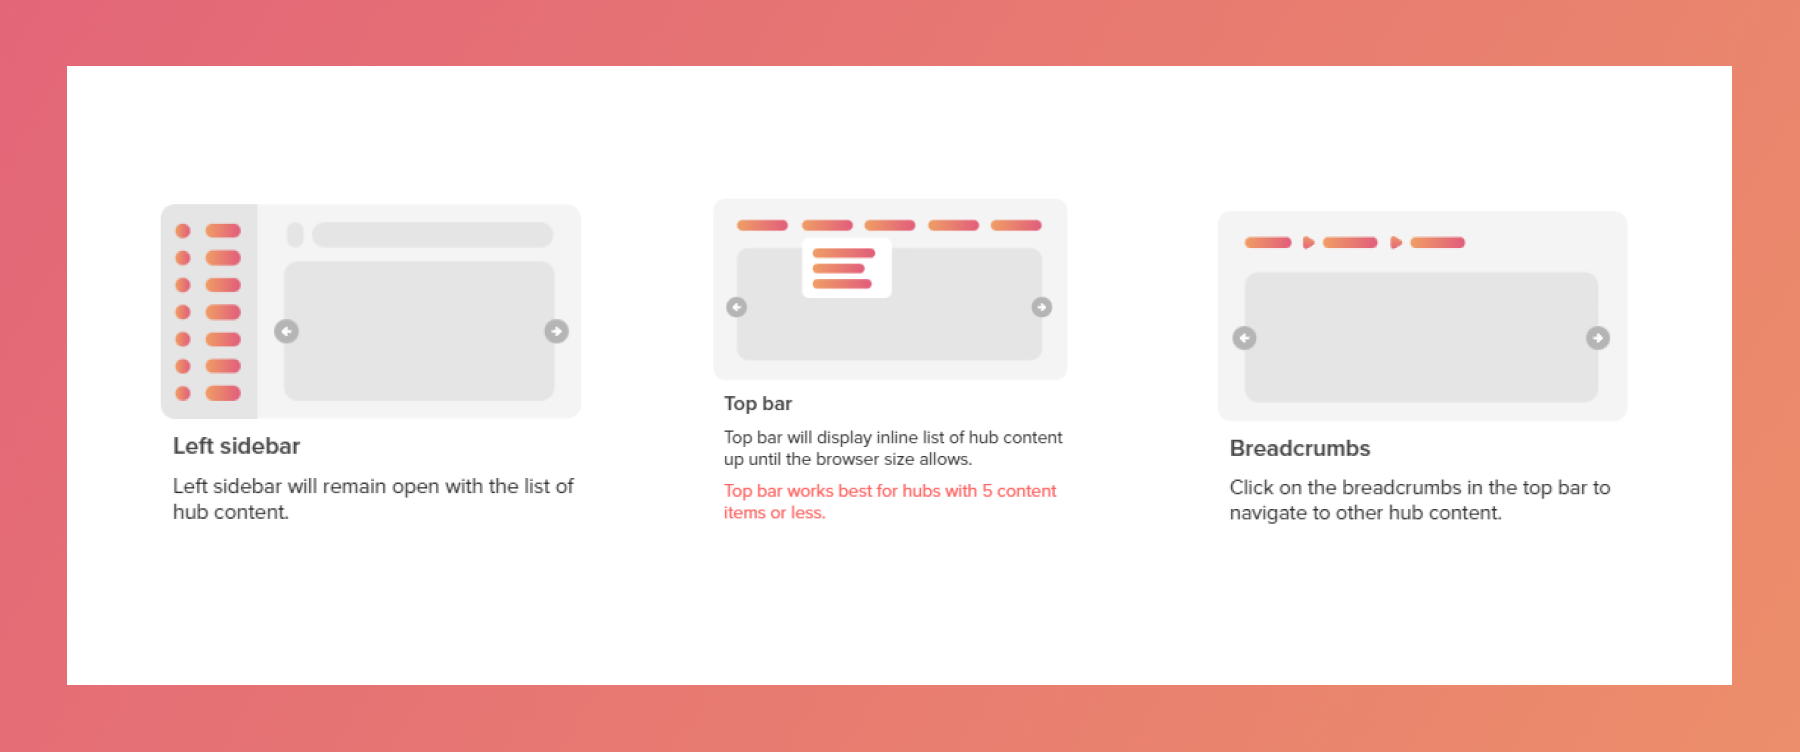
Changing Navigation
Click the "Navigation" option to edit its view.
.png)
There you can choose between Breadcrumbs, Top Bar and Left Sidebar.
Changing the View
Scroll to the Advanced tab and click "View" option.
.png)
There you can choose between Horizontal, Grid, List and Condensed List views.
.gif)
Setting a Sorting Method
Scroll to the Advanced tab and click "Sort" option.
To understand better How to sort and filter content in a hub, click here
.png)
How to Enable AI Content Chat™
Step 1
In the Enhancement tab, and enable "AI Content Chat" option.
To understand better how it works, click here.
.png)
Step 2
To use it, click "AI" button on top right corner.
.png)
Related Articles:
Thank you for joining us in this tutorial! If you have any questions or need help, feel free to email us at [email protected] or book a call here.